In light of the upcoming National Picnic Day on April 23, 2024, we wanted to make a bright and fun quilt pattern that could double as a picnic blanket as we get closer to the sunny season! Our Charming Borders Pattern uses The Lookout by Moda Fabrics, and it is sew cute! Plus, it’s on sale right now at Annie’s Quilt Shoppe!
This quilt pattern took me less than TWO HOURS start to finish! No joke! How did we put it together so fast? We used a Border Print Fabric to make some False Rows of “pieced” charm squares!
Using just 3 yards of fabric and minimal cutting & super fast piecing, this pattern is also perfect for last minute gifts! Follow the instructions below to make one of your own!

Charming Borders Quilt Pattern
Finished Size: 53” x 55.5”
*** PLEASE NOTE ***
Our FREE patterns are not pattern tested – please be flexible and make adjustments as needed
Fabric & Supplies:
- 1 Yard Border Print Fabric (A)
- 1 Yard Sashing/Thin Border Fabric *(B)
- (if the WOF of the sashing fabric is less than your Border Print Fabric, you will need 1.5 yards)
- 1 Yard Wide Border Fabric (C)
- Odif OdiCoat (optional–use for waterproofing backing to use as picnic blanket)
Cutting:
- Start by cutting Fabric A into (7) 5” x WOF strips perpendicular to the selvage. It should now look like you have a pieced row of 5” squares.
- Cut Fabric B into (12) 2.5” x WOF strips! Piece (4) strips together into pairs so that you have (2) extra long strips and (8) WOF strips. (If the WOF of Fabric B is SHORTER than Fabric A, cut (20) 2.5” x WOF strips and piece pairs of strips together until you have (10) extra long strips.)
- Cut Fabric C into (8) 4.5” strips. (You can trim the selvage on this one). Piece pairs of strips together until you have (4) extra long strips.
Assembly:
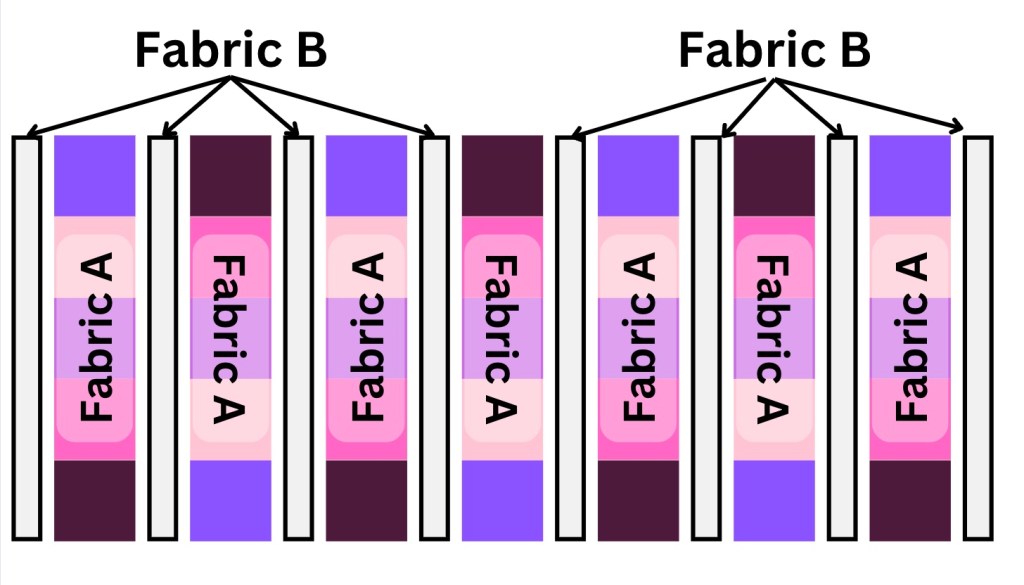
- Sew the Fabric A strips to the Fabric B WOF strips with RST, alternating between Fabric A & B. Rotate the Fabric A strips between each Fabric B to create a pattern. See figure below:
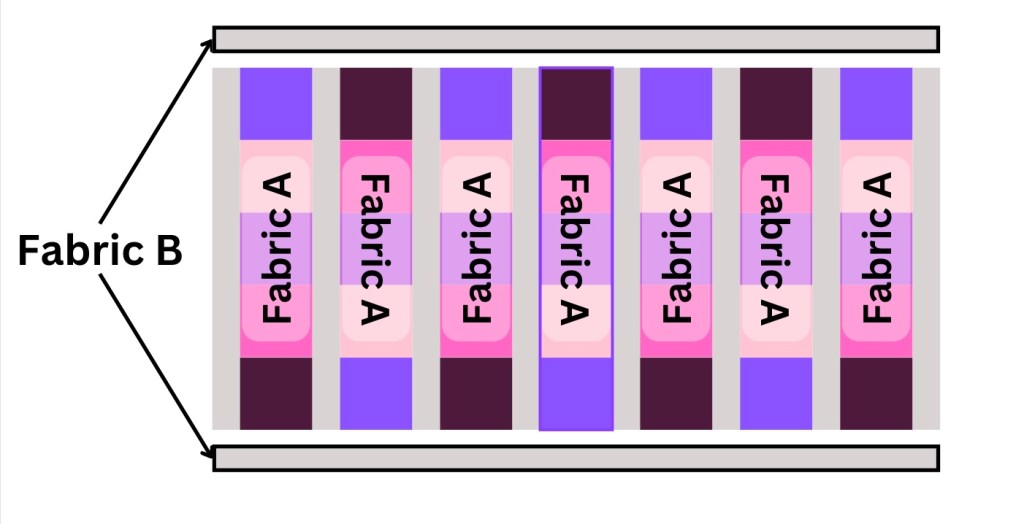
2. Sew the Extra Long Fabric B strips to the top & bottom of your Step 1 Project. See figure below:
3. Sew on Fabric C to the sides and top & bottom of the quilt following our Border Instructions!
Adding Borders to Quilt
- Measure width of quilt top and add 3”. Cut 2 strips of fabric width measurement by size of border. Pin both strips of fabric along the top of quilt. Cut the excess fabric off the edges. Sew 1 strip of fabric to top and 1 strip to bottom of quilt top.
- Measure length of quilt top and add 3”. Cut 2 strips of fabric length measurement by size of border. Pin both strips of fabric along the side of quilt. Cut the excess fabric off the edges. Sew 1 strip of fabric to each side of the quilt.
And you’re done! To finish the quilt, quilt the top with batting and backing, and add binding! If you want to use this quilt as a Picnic Blanket, use waterproof fabric as your backing fabric, or use Odif Odi-Coat or another waterproofing gel to waterproof your backing! Enjoy!

Leave a comment